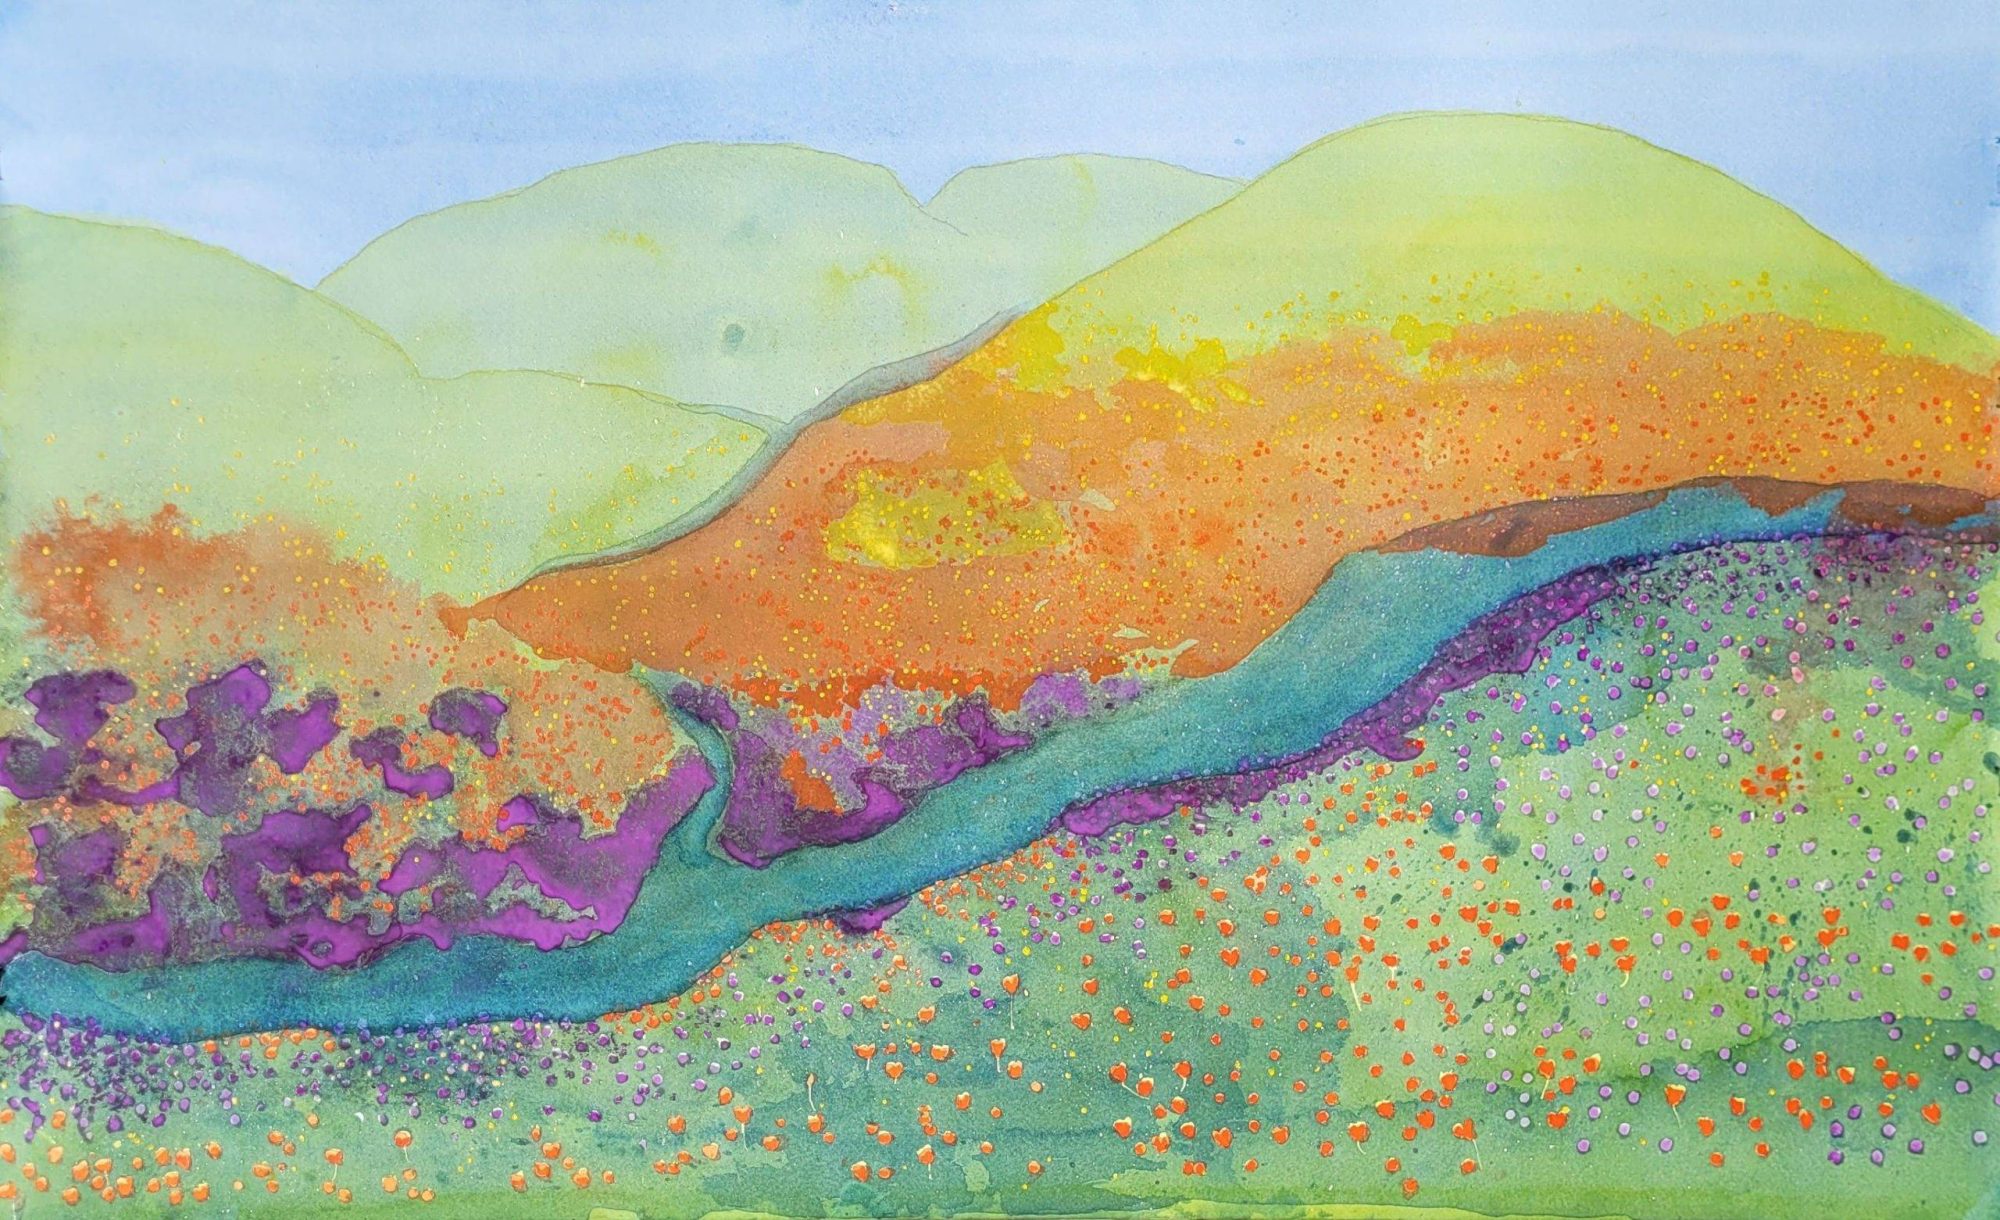
Steps to make a wildflower scene with watercolor using a full sheet of watercolor paper stretched drum tight. I like to use water to move the pigment. Stretching the watercolor paper this way helps prevent buckling and it always dries flat. Then I write step-by-step instructions for masking the flowers and building with liquid frisket.
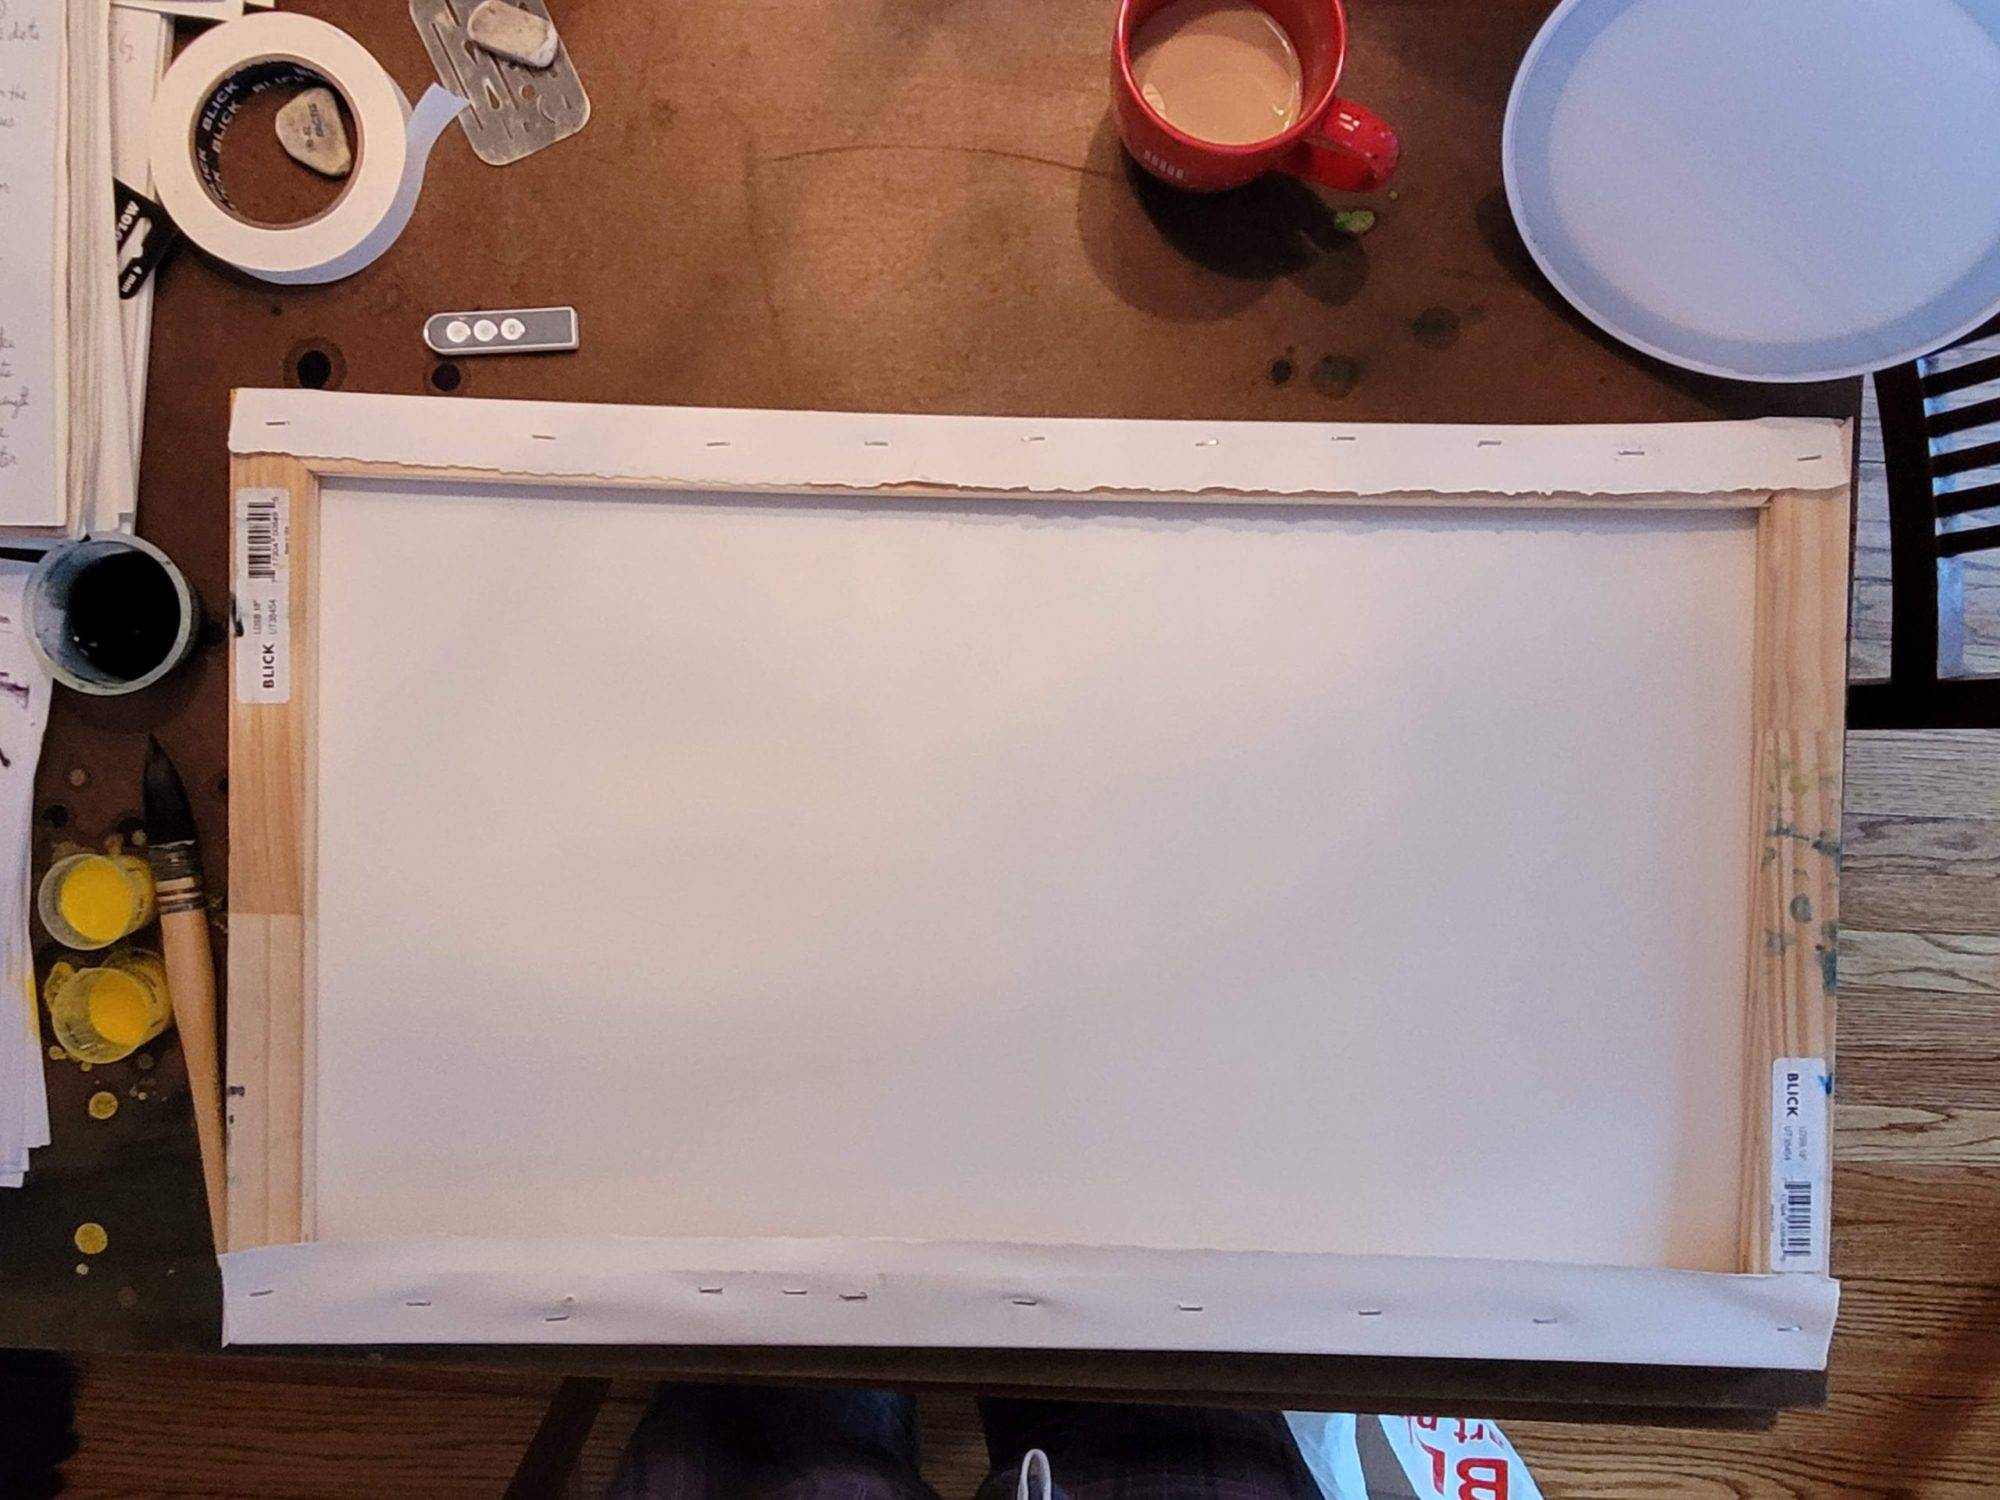
- Staple soaking wet watercolor full sheet (Arches cold press 140 lb 30″ x 22″) paper to wooden stretcher frame (Blick 30″ and 18″ stretcher bars). Let dry overnight.
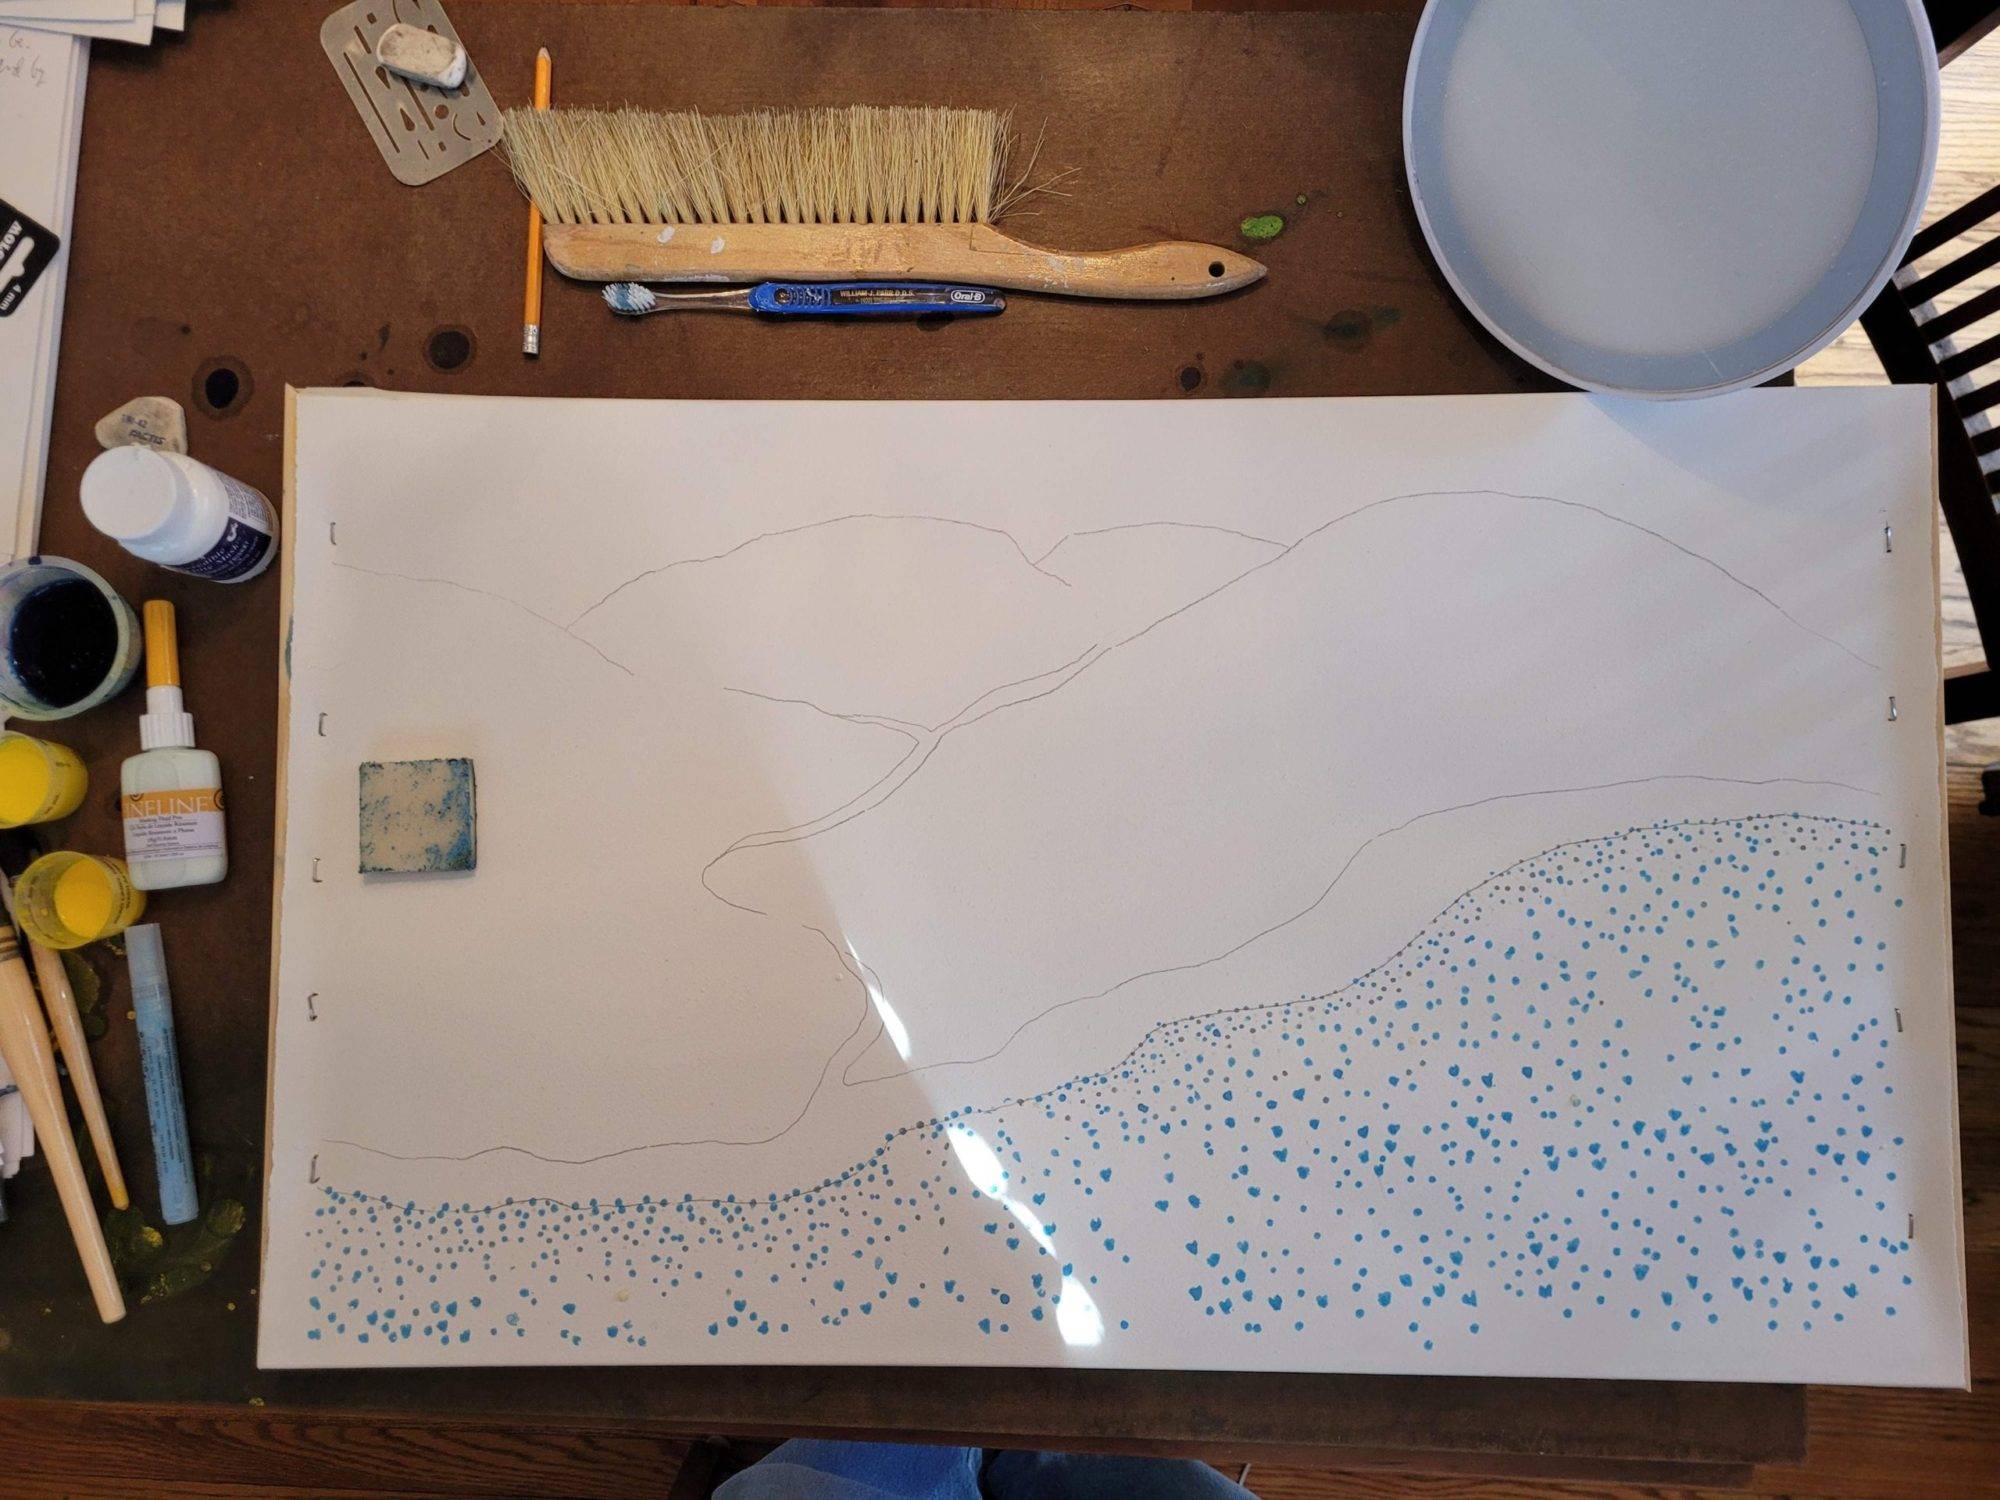
- Lightly draw terrain elements. Hills in front of distant hills using a #2 or HB pencil.
- Use Grafx “art masking liquid pump marker” to draw poppies and bluebells. As you recede into the picture the scale of the wildflowers should shrink. I used three techniques to place masking fluid of three different sizes. Use a toothbrush held over the bottle of Incredible White Mask Liquid Frisket while flicking or spattering. Let the masking fluid dry one hour.
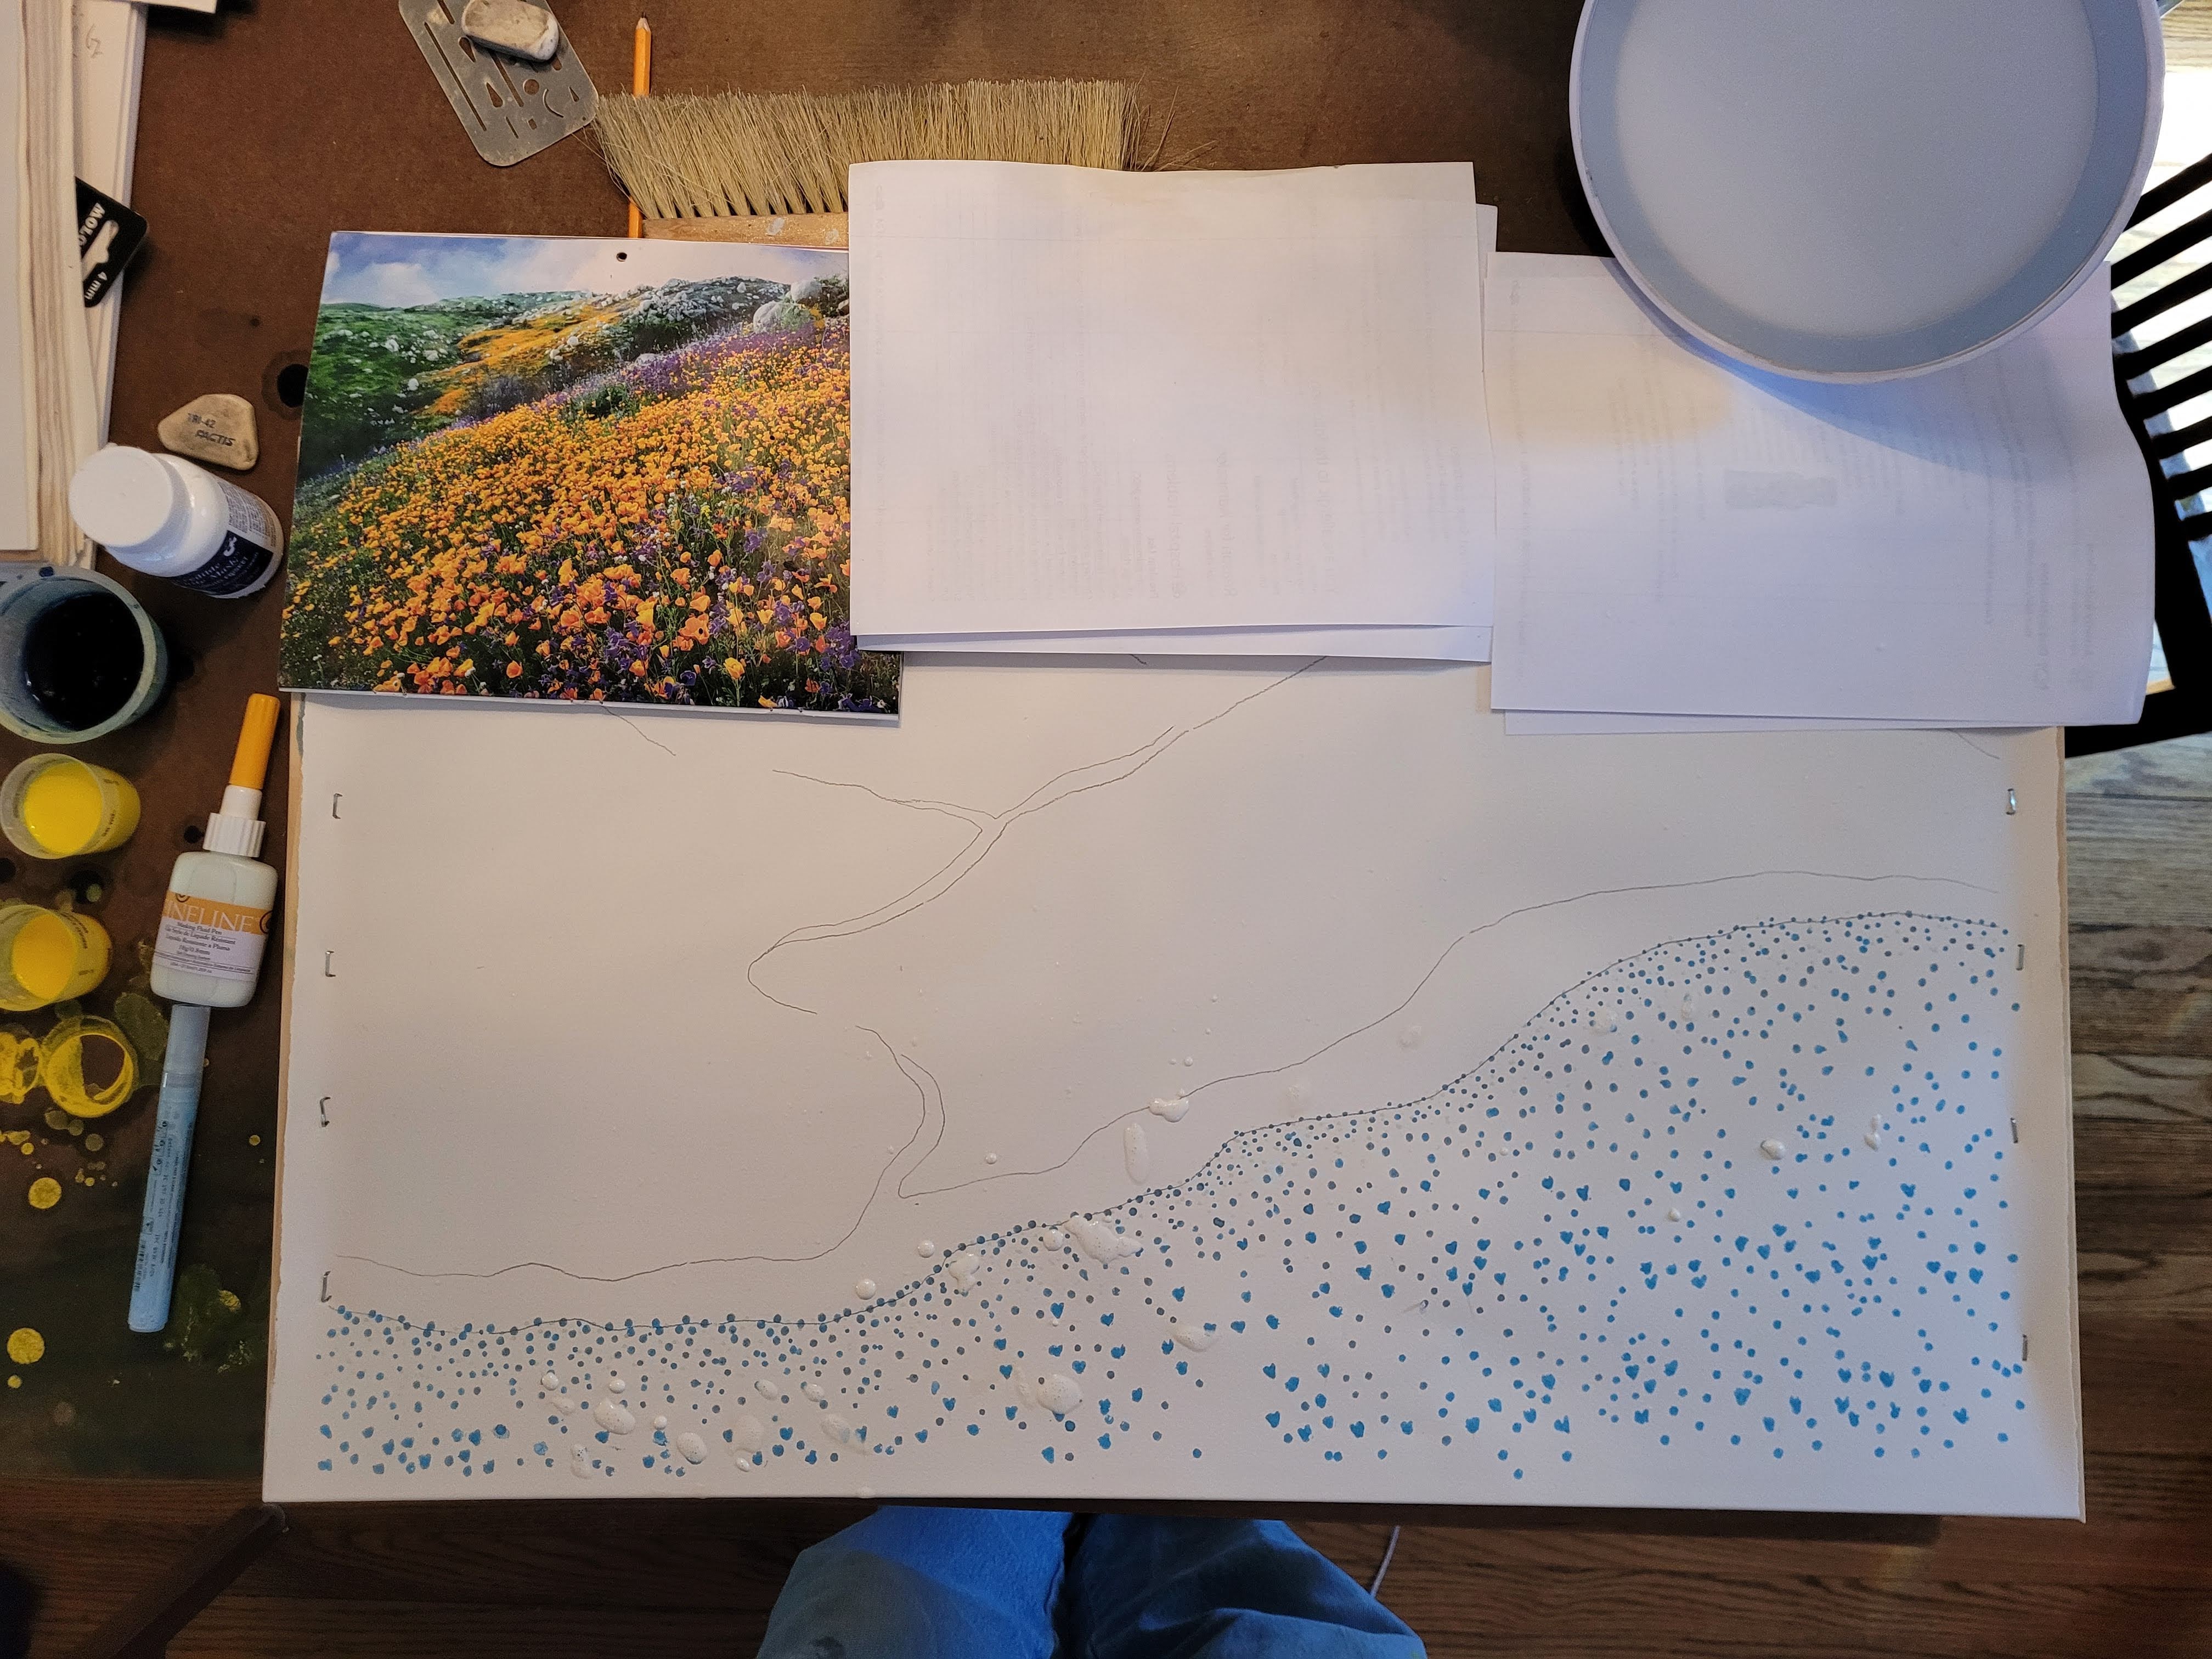
- With Grafx Liquid Frisket Remover (or your finger) remove elements of masking which are not appropriate for one of the three different sizes. Remove stray drips or ANY masking that is not a flower or white fleck. Inspect the paper for any masking fluid smears (remove these completely) or mistakes in the flowers, leaving the tiniest dots for white flecks. Add additional spattering for good wildflower density but clean up again after these dry. Check for any dirt or hair on the paper before the next step. This is your last chance to correct an error in wildflower pattern, sizes, density, or positions.
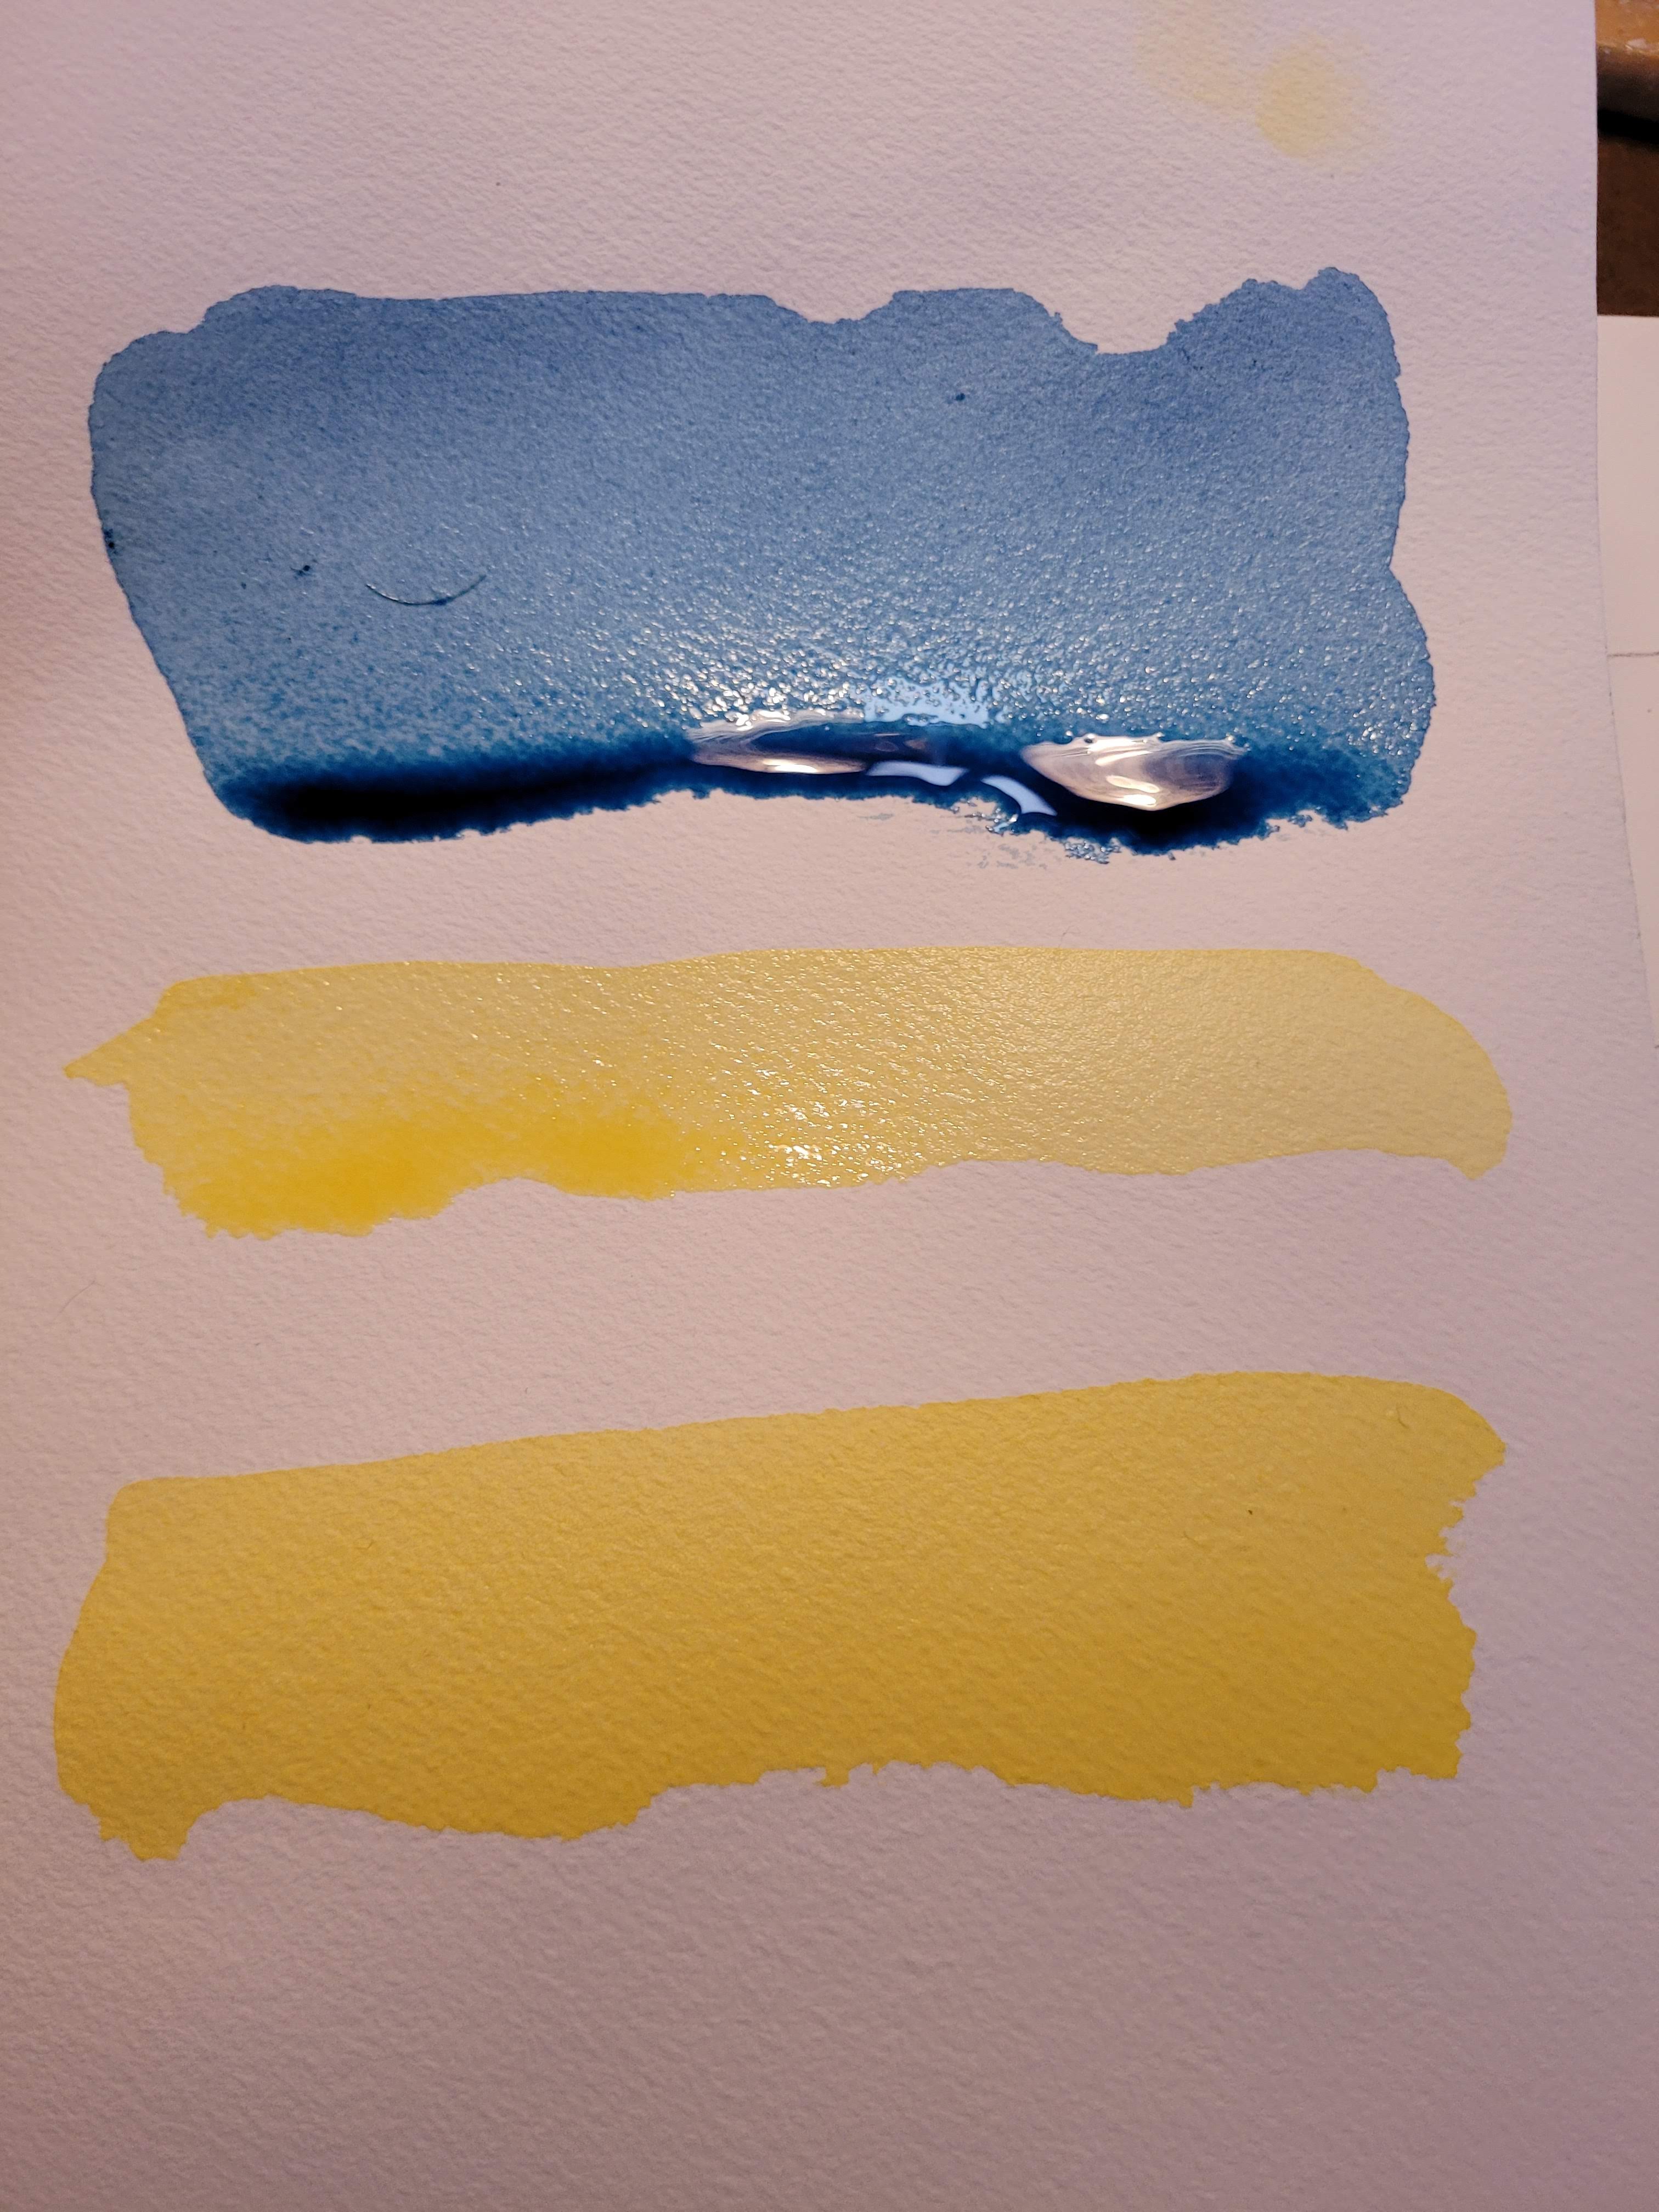
- Use a light mixture of Prussian Blue to carefully wash the entire paper. Barely touching the paper with the brush (squirrel mop #8) wash lightly from side to side using the brush to guide rows of the transparent watercolor mix from the top of the page to the bottom. Use the bead of paint at the bottom of the row to start the next row moving down the watercolor paper that is tipped toward you. Do not tip the paper so much that the beads run down the page – only about 25°.
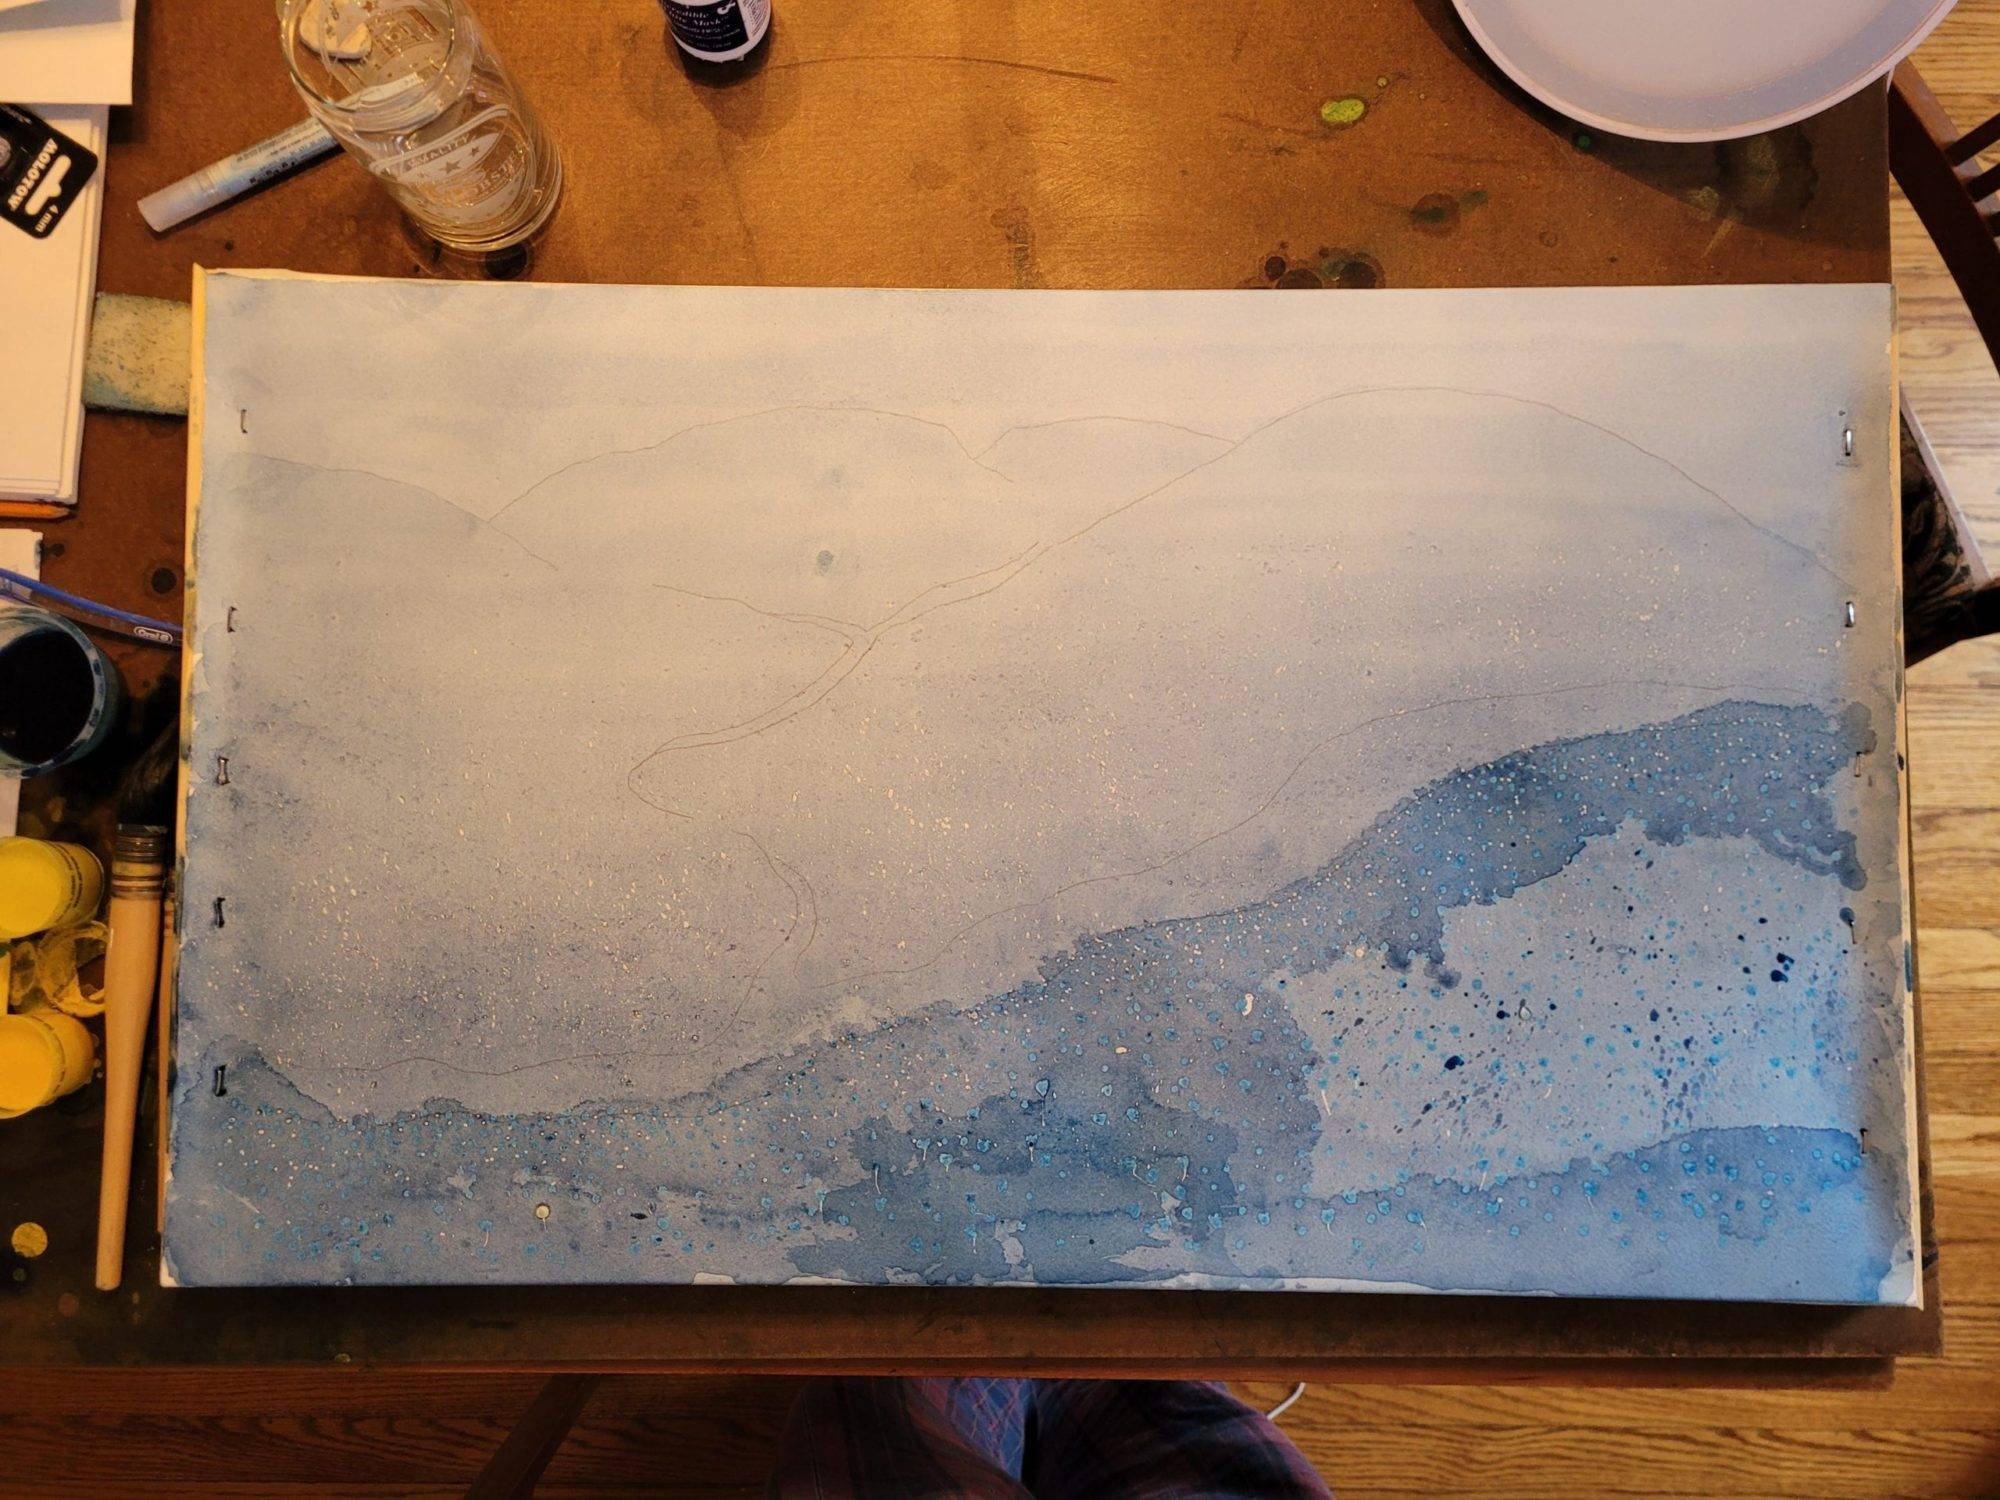
- When the paper has dried completely you will create contrast, shape, and depth in one step. Using water with a hint of Prussian Blue wash the distant hills tracing their outline against the sky. Add a little more Prussian Blue and wash further down the page (closer to you). The paper can be flat for this stage or tipped slightly toward you. Continue adding more Prussian Blue until you are using the full strength of the previous wash to reach the bottom of the page. You should now see the topography and depth. You can add texture my doing some abstract washes and tipping the paper back and forth. You can add texture by spattering Prussian Blue in the foreground. You can change the shapes by bumping or tilting the paper. Once the wash begins to dry you need to stop and remove puddles (unless you want blooms/backruns in your texture). I try to run excess water off the page and absorb the edge with a paper towel. I have also lightly spattered/sprayed water into these abstract shapes to get them to move. Keep in mind with more water you will have more problems managing the excess.
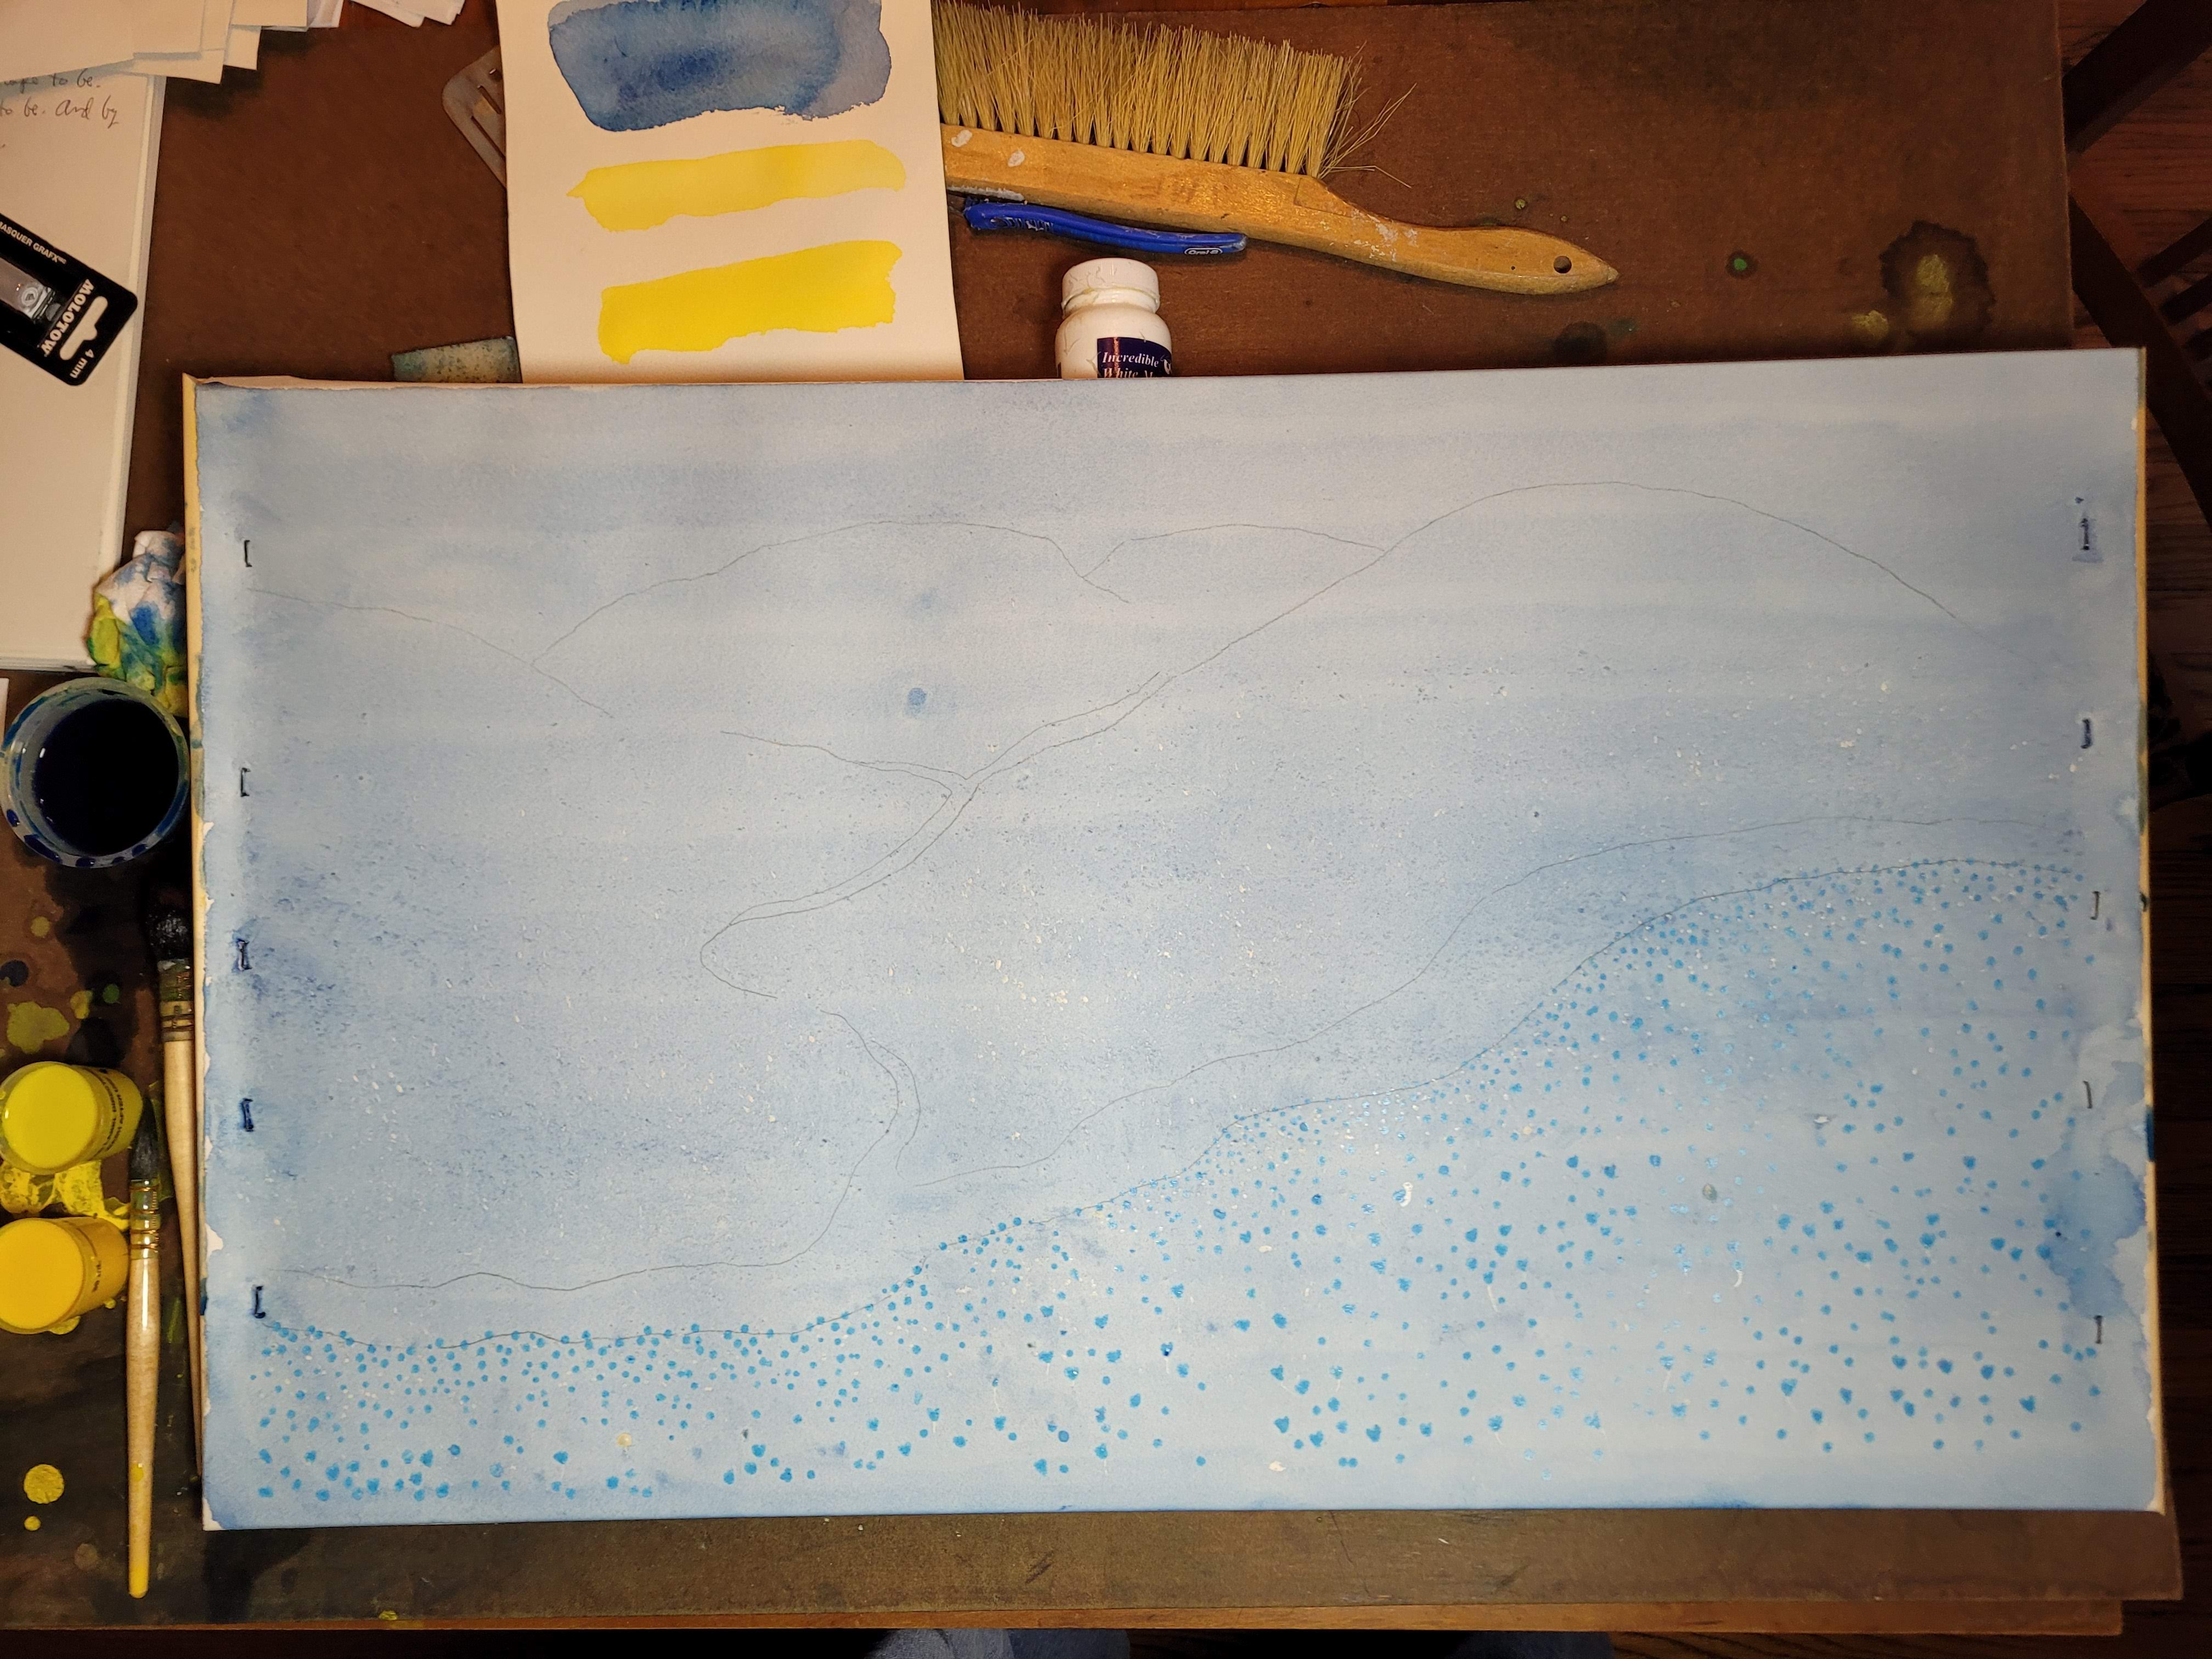
- After the second Prussian Blue wash has completely dried (at least 2 hours but preferably over night) you can remove only SOME of the masking. Remove what will be poppies in the foreground and middle. These will be the largest of the dots you masked and made yellow by the next step. The remaining dots will be either painted bluebells or very small white flecks.
- Use a cool yellow (lemon) wash over the distant hills being very careful not to drip in the sky area. Again, you are washing with the utmost care not to put brush pressure on the dried Prussian Blue. You should prop-up the page about 25° but you can adjust this mid wash if necessary. You dont want puddles as they will back run. The wash needs to exit the page and there you can use a paper towel. Immediately below the lemon yellow follow with a warm yellow (Hansa) wash in the middle and foreground. All the yellow must be applied together – cool in the far distant hills and warm in the closer hills. Let this dry at least 2 hours. Now decide if your green is what you want. More yellow can be applied to the middle and forground but the far distant hills should be left slightly faded (atmospheric perspective).
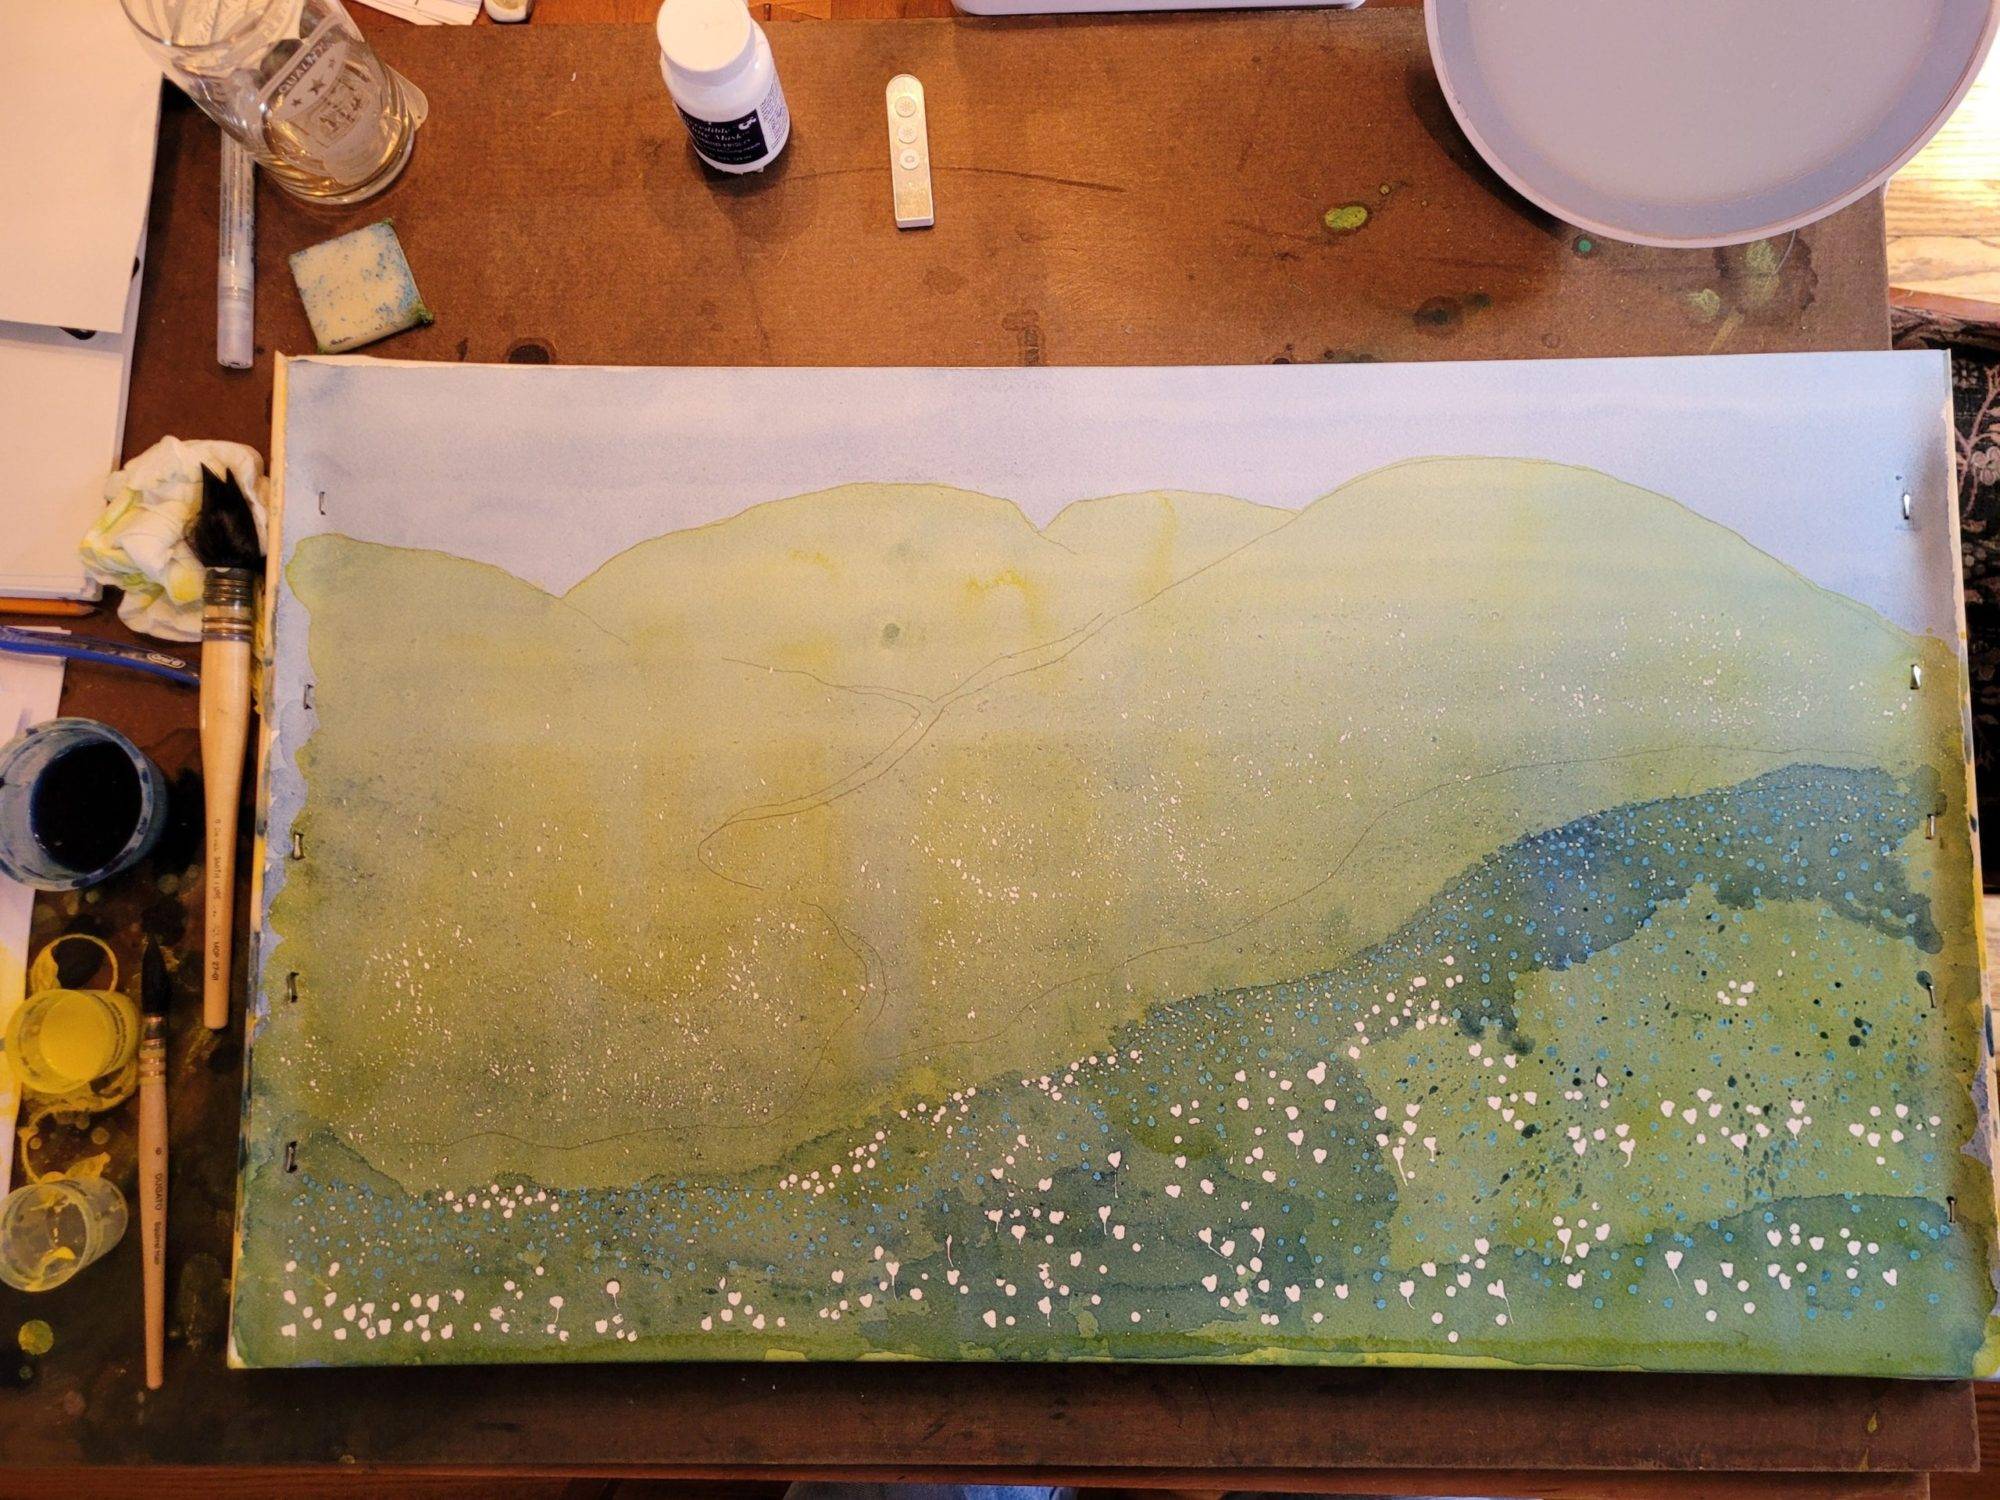
- Remove the bluebell masking and white flecks masking using the Grafx liquid frisket remover. These will be the middle size dots and the smallest dots.
- With a medium #6 squirrel mop use a 50% diluted mixture of the Prussian Blue to make a light wash over shadow areas only. Paint the wash area with clean water using a clean brush and then drop in the diluted blue. Monitor this as it dries to prevent back-runs. I must admit that I lost control of the painting at this point because I made my shadows with full strength. They were too dark and they look like a river instead. By pushing and pulling additional overlays of purple, orange, and yellow, the painting remained readable but looks quite different.
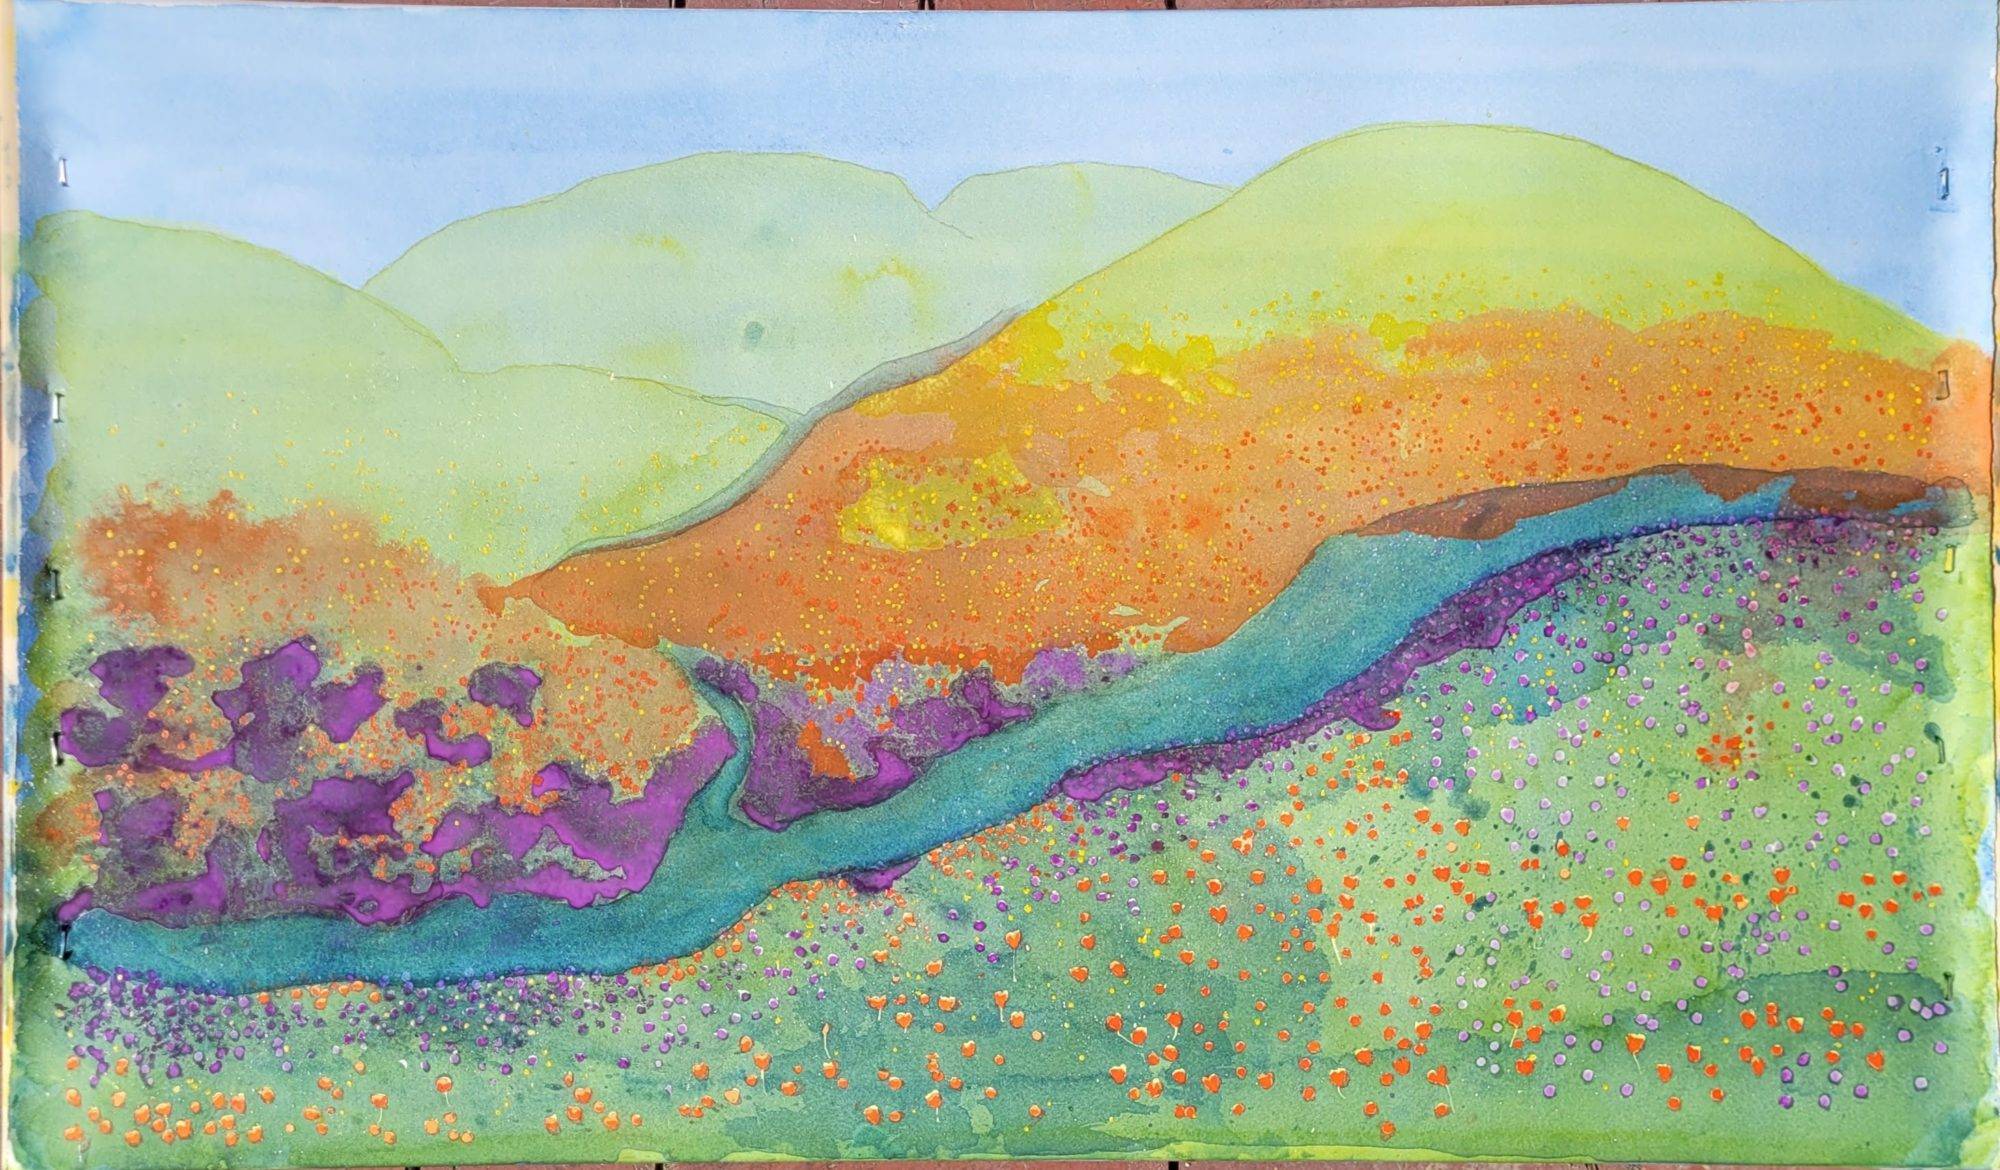
- Last step is to paint actual poppies and bluebells. Take your time with this and be careful. Use paint right out of the tube or slightly watered down. When your painting is finished you can leave it on the stretcher bars to hang it, or frame this with the stretcher bars, or cut it out and frame just the paper behind glass.